Introduction
Getting a new iPhone is exciting, whether you’ve upgraded to the latest model or chosen a professionally refurbished device. However, one question almost every user asks before switching is: How do I transfer all my data to my new iPhone without losing anything?
The good news is that Apple has made the process much easier than it used to be. Today, you can transfer your photos, videos, contacts, messages, apps, settings, passwords, and even your Apple Watch data in just a few simple steps. Depending on your situation, you can use Quick Start, iCloud Backup, Mac or PC Backup, or transfer data directly from your old iPhone.
Choosing the right method depends on your current device, internet connection, available iCloud storage, and whether you’re setting up a brand-new or refurbished iPhone. Understanding each option will help you avoid common problems such as missing photos, incomplete app downloads, or failed transfers.
In this complete UK guide, we’ll explain:
- The easiest ways to transfer data to a new iPhone
- How Apple’s Quick Start feature works
- How to use iCloud Backup to restore your information
- How to transfer data without using iCloud
- What to do if your old iPhone is lost or damaged
- Common transfer problems and how to fix them
- Tips for making the process faster and safer
- Why buying a professionally refurbished iPhone from iExpert Market makes upgrading simple and reliable
If you’re planning to trade up to a newer device, you may also find our guide on How to Backup iPhone on the Phone: Complete Step-by-Step Guide, as creating a fresh backup ensures your important data is protected before you move to your new iPhone.
Quick Answer: How Do You Transfer Data to a New iPhone?

The easiest way to transfer data to a new iPhone is by using Apple’s Quick Start feature. Simply place your old and new iPhone next to each other, connect both devices to Wi-Fi, keep Bluetooth enabled, and follow the on-screen instructions. Your apps, photos, contacts, messages, settings, and most personal data will be transferred automatically.
If your old iPhone isn’t available, you can restore your information from an iCloud Backup or a backup stored on your Mac or Windows PC. Each method is secure and designed to help you continue using your new iPhone with minimal interruption.
What Can You Transfer to a New iPhone?
One of the biggest concerns when upgrading is whether you’ll lose your personal information. Fortunately, Apple’s transfer tools are designed to move almost everything, allowing your new iPhone to feel familiar from the moment you start using it.
Depending on the transfer method you choose, you can usually move:
| Data Type | Transfers to New iPhone |
|---|---|
| Contacts | Yes |
| Photos & Videos | Yes |
| Messages (SMS & iMessage) | Yes |
| Apps | Yes |
| App Data | Yes (for supported apps) |
| Apple ID Settings | Yes |
| Wi-Fi Passwords | Yes |
| Device Settings | Yes |
| Health Data | Yes |
| Safari Bookmarks | Yes |
| Notes & Calendars | Yes |
| Passwords & Keychain | Yes |
| Apple Watch Data | Yes (after pairing again) |
Most users are surprised by how much information transfers automatically. Once the setup is complete, your new iPhone usually looks and feels almost identical to your previous device, making the upgrade quick and stress-free.
Things to Do Before Transferring Data to a New iPhone
Before you start transferring your data, it’s worth spending a few minutes preparing both devices. Many transfer problems – such as missing photos, incomplete app downloads, or setup failures – happen because one or two simple steps were skipped.
Taking a little time to prepare can make the entire process much smoother and help ensure that everything moves across successfully the first time.
1. Create a Fresh Backup of Your Old iPhone
Even if you’re planning to use Quick Start, creating a recent backup is one of the smartest things you can do.
A backup gives you peace of mind. If something interrupts the transfer or your old iPhone develops a problem during the process, you’ll still have a secure copy of your important data. You can back up your iPhone by using:
- iCloud Backup
- Finder on a Mac
- iTunes on a Windows PC or older Mac
If you’re unsure how to create a backup, our How to Backup iPhone on the Phone: Complete Step-by-Step Guide explains the entire process.
2. Charge Both iPhones
A data transfer can take anywhere from a few minutes to over an hour, depending on how much data you have. To avoid interruptions:
- Charge both iPhones to at least 50% battery.
- Ideally, keep both devices connected to their chargers throughout the transfer.
- Don’t disconnect either phone until the setup has completely finished.
This is especially important if you’re transferring thousands of photos, videos, or large apps.
3. Connect to a Stable Wi-Fi Network
Most transfer methods rely on a reliable internet connection.
Using a stable Wi-Fi network helps:
- Download apps faster
- Restore photos and videos
- Verify your Apple ID
- Complete iCloud syncing
- Reduce transfer errors
Public Wi-Fi networks may be slower or less reliable, so using your home or office connection is usually the better option.
4. Turn On Bluetooth
If you’re using Apple’s Quick Start feature, Bluetooth must be enabled on both devices. Quick Start uses Bluetooth to detect the new iPhone before establishing a secure connection for the transfer.
You can enable Bluetooth by opening:
Settings → Bluetooth
Once it’s switched on, keep both iPhones close together throughout the setup process.
5. Update Both iPhones to the Latest Version of iOS
Although it isn’t always essential, having both devices running the latest version of iOS helps avoid compatibility issues. Software updates often include:
- Bug fixes
- Improved transfer reliability
- Better security
- Performance improvements
To check for updates:
Settings → General → Software Update
Installing any available updates before transferring your data can save time troubleshooting later.
6. Make Sure You Know Your Apple ID Password
You’ll need your Apple ID to:
- Sign in on your new iPhone
- Restore purchases
- Access iCloud
- Download apps
- Sync passwords
- Enable Find My iPhone
If you can’t remember your password, it’s a good idea to reset it before starting the transfer rather than interrupting the setup halfway through.
7. Check Available iCloud Storage
If you’re restoring from an iCloud backup, make sure you have enough storage to create a complete backup. Large photo libraries, videos, and documents can quickly fill your available space. If your iCloud storage is full, you may need to:
- Delete old backups
- Remove unnecessary files
- Upgrade your iCloud storage plan
A complete backup ensures that everything important is available when setting up your new iPhone.
Before You Begin: Quick Preparation Checklist
| Task | Recommended |
|---|---|
| Back up your old iPhone | Yes |
| Charge both devices | Yes |
| Connect to Wi-Fi | Yes |
| Turn on Bluetooth | Yes |
| Update to the latest iOS version | Yes |
| Know your Apple ID password | Yes |
| Check available iCloud storage | Yes |
| Keep both devices nearby | Yes |
Spending just a few minutes on these checks can prevent many of the common issues people encounter during setup and help ensure your transfer finishes successfully.
Expert Tip
If you’re upgrading to a professionally refurbished iPhone from iExpert Market, you can follow exactly the same transfer process as you would with a brand-new iPhone. Every refurbished iPhone is reset to factory settings before sale, allowing you to restore your apps, photos, contacts, and personal data securely during the initial setup.
Methods to Transfer Data to a New iPhone
Apple offers several ways to move your data from an old iPhone to a new one. The best option depends on whether you still have your previous device, how much data you need to transfer, and whether you prefer using iCloud or a computer.
For most users, Quick Start is the fastest and easiest method because it transfers your information directly between two iPhones with very little effort. However, if your old device is unavailable or you’ve already created a backup, restoring from iCloud or a computer may be the better choice.
Here’s a simple comparison to help you choose the right method.
| Transfer Method | Best For | Internet Required | Difficulty |
|---|---|---|---|
| Quick Start | You have both iPhones | Wi-Fi required | Easy |
| iCloud Backup | Old iPhone isn’t available | Yes | Easy |
| Mac or PC Backup | Large backups or limited iCloud storage | No (after backup) | Moderate |
| Direct Wired Transfer | Large amounts of data | Minimal | Easy |
Most people upgrading to a refurbished iPhone from iExpert Market choose Quick Start, as it’s the quickest way to copy everything from one iPhone to another.
Method 1: Transfer Data Using Quick Start (Recommended)
Quick Start is Apple’s easiest and most popular transfer method. It allows you to move your apps, photos, contacts, messages, settings, passwords, and much more directly from your old iPhone to your new one.
If both devices are working properly, this is usually the fastest option.
What You’ll Need
Before you begin, make sure:
- Both iPhones are charged.
- Wi-Fi is connected.
- Bluetooth is turned on.
- Your old iPhone is running iOS 12.4 or later.
- Both devices are placed close together.
Step 1: Turn On Your New iPhone
Press and hold the power button until the Apple logo appears. Choose your language and region until you reach the Quick Start screen.
Step 2: Place Both iPhones Together
Unlock your old iPhone and place it beside your new one. Within a few seconds, a message should appear asking whether you’d like to use your Apple ID to set up the new iPhone.
Tap Continue.
If the message doesn’t appear, make sure Bluetooth is enabled on both devices and restart them if necessary.
Step 3: Scan the Animation
A blue animation will appear on the new iPhone. Use the camera on your old iPhone to scan this animation. This securely pairs the two devices.
If scanning isn’t possible, you can select Authenticate Manually and follow the on-screen instructions.
Step 4: Enter Your Passcode
Enter the passcode from your old iPhone on the new device. You’ll then be asked to set up Face ID or Touch ID if your new iPhone supports it.
Step 5: Choose “Transfer from iPhone”
You’ll now see several setup options. Select Transfer from iPhone. Your new iPhone will begin copying your data directly from the old one.
During this process, your apps, contacts, messages, photos, settings, passwords, and other supported data will start transferring automatically.
Step 6: Wait for the Transfer to Finish
The transfer time depends on how much data you have. For example:
| Amount of Data | Estimated Transfer Time |
|---|---|
| Less than 20 GB | 10-20 minutes |
| 20-100 GB | 20-60 minutes |
| More than 100 GB | 1-2 hours or longer |
Larger photo libraries and video collections naturally take longer. Keep both iPhones connected to power and avoid using either device until the transfer has completed.
Method 2: Transfer Data to a New iPhone Using iCloud Backup
If you no longer have your old iPhone with you, or you’ve already erased it, restoring your data from an iCloud Backup is one of the easiest ways to set up your new iPhone. This method is also ideal if you’re replacing a lost or damaged device, as long as you’ve backed it up to iCloud beforehand.
Unlike Quick Start, this method downloads your data from Apple’s cloud servers. That means you’ll need a stable Wi-Fi connection and enough iCloud storage for your backup.
How to Restore Your New iPhone from an iCloud Backup?
Follow these steps:
- Turn on your new iPhone.
- Complete the initial setup until you reach the Apps & Data screen.
- Select Restore from iCloud Backup.
- Sign in using your Apple ID.
- Choose your most recent backup.
- Keep your iPhone connected to Wi-Fi and power while the restore completes.
- Wait for your apps, photos, messages, and settings to finish downloading.
The time required depends on the size of your backup and the speed of your internet connection.
What Transfers from an iCloud Backup?
An iCloud Backup can restore most of your important information, including:
- Contacts
- Photos and videos
- Messages
- Notes
- Calendars
- Device settings
- Wi-Fi passwords
- Safari bookmarks
- App Store apps
- App data (where supported)
- Health data
- Home Screen layout
Some items, such as Apple Pay cards, Face ID, Touch ID, and certain banking app credentials, will need to be set up again for security reasons. If you’re not sure whether your latest backup is complete, read our guide How to Backup iPhone on the Phone before restoring your new device.
When Should You Use an iCloud Backup?
This method is recommended if:
- Your old iPhone isn’t available.
- You’re upgrading after your previous device was lost or damaged.
- You’ve already created a recent iCloud Backup.
- You want to restore your iPhone exactly as it was.
Method 3: Transfer Data to a New iPhone Using a Mac or Windows PC
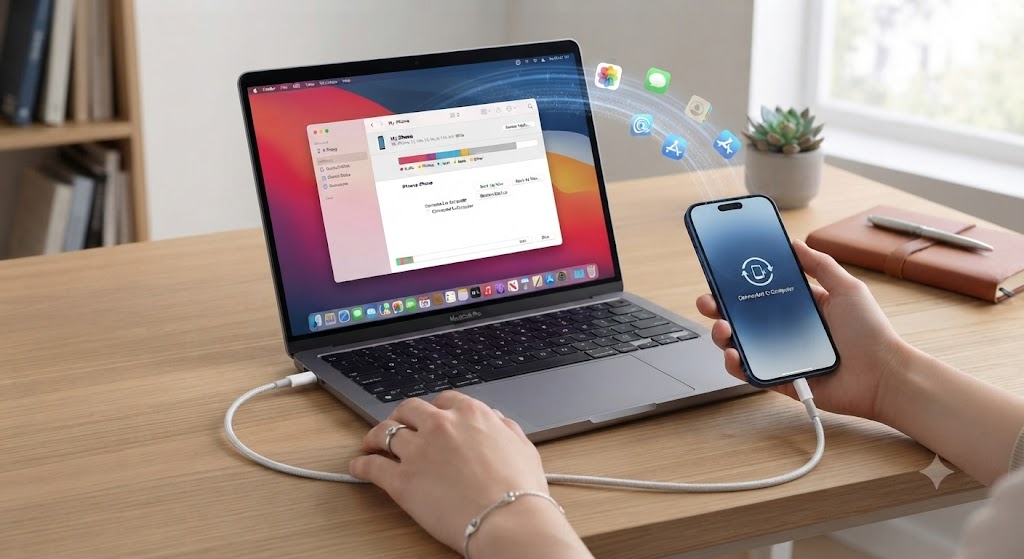
If you prefer keeping a local backup or don’t have enough iCloud storage, restoring your new iPhone from a computer is another reliable option. This method works with both Macs and Windows PCs and is especially useful when transferring large amounts of data.
Using an encrypted backup also ensures that sensitive information such as passwords, Health data, and Wi-Fi settings is restored.
How to Transfer Data Using a Computer Backup
Follow these steps:
- Connect your old iPhone to your Mac or PC using a USB cable.
- Open Finder (macOS Catalina or later) or iTunes (Windows or older Macs).
- Select your iPhone.
- Choose Back Up Now.
- Tick Encrypt Local Backup if you want passwords, Health data, and saved accounts included.
- Once the backup is complete, disconnect your old iPhone.
- Connect your new iPhone.
- During setup, choose Restore from Mac or PC.
- Select your latest backup and wait for the restore to finish.
Why Choose a Computer Backup?
Many users prefer this method because it offers several advantages:
- Faster restoration for large backups
- No need for additional iCloud storage
- Works without relying on cloud downloads
- Restores more secure data when encrypted
- Ideal for users with slower internet connections
Method 4: Transfer Data from Android to a New iPhone
Switching from Android to iPhone is easier than ever thanks to Apple’s Move to iOS app. The app securely transfers your essential data without requiring advanced technical knowledge.
How to Transfer Data from Android to iPhone
- Install Move to iOS from the Google Play Store.
- Turn on your new iPhone.
- During setup, select Move Data from Android.
- Open the Move to iOS app on your Android device.
- Enter the verification code shown on your iPhone.
- Choose the content you want to transfer.
- Wait until the process is complete before using either device.
What Can Be Transferred?
Move to iOS can transfer:
- Contacts
- Messages
- Photos
- Videos
- Calendars
- Email accounts
- Accessibility settings
- Web bookmarks
Some Android apps have iPhone versions that will automatically be suggested during setup, although not every app or app’s internal data can be transferred.
What Transfers Automatically with Quick Start?
When the setup is complete, most users will find that almost everything has been copied across, including:
- Contacts
- Photos and videos
- Messages
- Installed apps
- App data (where supported)
- Wi-Fi passwords
- Apple ID settings
- Safari bookmarks
- Notes
- Calendars
- Health data
- Keychain passwords
- Wallpapers and preferences
Some apps, particularly banking or security-related apps, may ask you to sign in again for security reasons.
Expert Tip
Even after the Quick Start transfer finishes, your new iPhone may continue downloading apps, photos, and files in the background for several hours. This is completely normal. To speed up the process, keep your iPhone connected to Wi-Fi and a charger until everything has fully synced.
How to Transfer Data to a New iPhone Using Different Methods?
There isn’t just one way to transfer data to a new iPhone. Apple offers several reliable methods, and the best option depends on your current device, internet connection, and how much data you need to move.
Whether you’re upgrading to the latest iPhone, switching from an older Apple device, or moving from Android, choosing the right transfer method can save time and help avoid common setup problems.
Below are the most effective ways to transfer your data safely.
1. Quick Start (Best for Most Users)
For most people, Quick Start is the fastest and easiest way to transfer data to a new iPhone. It wirelessly copies your apps, settings, photos, messages, passwords, and other personal data directly from your old iPhone.
This method is ideal if both devices are available and running a recent version of iOS.
How to Use Quick Start
- Turn on your new iPhone and place it next to your old iPhone.
- Ensure Bluetooth is enabled on your current device.
- Wait for the Quick Start screen to appear.
- Tap Continue.
- Scan the animation displayed on your new iPhone using your old one.
- Enter your old iPhone’s passcode when prompted.
- Follow the on-screen instructions to set up Face ID or Touch ID.
- Select Transfer from iPhone.
- Keep both devices connected to Wi-Fi and plugged into power until the transfer finishes.
The time required depends on how much data you’re moving. Smaller transfers may complete in 15–30 minutes, while larger photo libraries can take over an hour.
Best for:
- Upgrading from one iPhone to another
- Users who have both devices available
- Fast, wireless transfers
2. Transfer Data from an iCloud Backup
If you’ve already backed up your old iPhone to iCloud, you can restore everything during the setup process on your new device. This method is especially useful if you’ve already sold, traded in, or no longer have access to your previous iPhone.
Steps to Restore from iCloud
- Turn on your new iPhone.
- Follow the setup instructions until you reach Apps & Data.
- Select Restore from iCloud Backup.
- Sign in using your Apple ID.
- Choose your most recent backup.
- Wait while your data downloads.
Initially, only essential information is restored. Photos, apps, and documents continue downloading in the background after setup, so keep your iPhone connected to Wi-Fi.
Best for:
- Users replacing a lost or damaged iPhone
- People upgrading without their old device
- Anyone who regularly uses iCloud Backup
3. Transfer Data Using a Mac or Windows PC
If you prefer keeping local backups or have limited iCloud storage, transferring your data from a computer is another reliable option.
Simply restore your most recent backup to your new iPhone.
Using a Mac
- Connect your old iPhone.
- Open Finder.
- Create a full encrypted backup.
- Disconnect the old device and connect your new iPhone.
- Select Restore Backup.
Using a Windows PC
- Install the latest version of Apple Devices or iTunes (depending on your Windows version).
- Connect your old iPhone.
- Create a complete backup.
- Connect your new iPhone.
- Restore the backup during setup.
Using an encrypted backup ensures passwords, Health data, Wi-Fi settings, and saved accounts are also transferred.
Best for:
- Large storage devices
- Limited internet connections
- Users who prefer offline backups
4. Move Data from Android to iPhone
If you’re switching from Android, Apple provides the Move to iOS app to make the transition much easier. The app transfers many important items, including:
- Contacts
- Messages
- Photos
- Videos
- Calendars
- Email accounts
- Browser bookmarks
- Accessibility settings
How It Works
- Download Move to iOS on your Android phone.
- Begin setting up your new iPhone.
- Select Move Data from Android.
- Enter the verification code shown on the iPhone.
- Choose the content you want to transfer.
- Wait until the process finishes.
Some items, such as downloaded music, certain apps, or app-specific data, may need to be moved manually because they aren’t supported by Apple’s transfer tool.
What Data Can You Transfer to a New iPhone?
One of the biggest concerns people have before upgrading is whether they’ll lose important files or need to start from scratch. Fortunately, Apple has made the transfer process straightforward, and in most cases, nearly all of your personal data can be moved to your new iPhone.
Whether you’re using Quick Start, iCloud Backup, or a computer backup, your new iPhone can look and feel almost identical to your old one once the transfer is complete.
1. Data That Transfers Automatically
Most transfer methods include the following data:
- Contacts
- Photos and videos
- Messages (SMS, MMS, and iMessage)
- Call history
- Notes
- Calendars
- Safari bookmarks and reading list
- Email accounts
- Wi-Fi passwords
- Device settings
- Wallpapers
- App Store apps
- App data (for supported apps)
- Health and Fitness data (with encrypted backups or iCloud)
- Apple Wallet settings (some cards may need to be added again)
- Face ID and Touch ID settings (these must be set up again for security)
If you use iCloud Photos, your photo library will continue syncing automatically after you sign in with your Apple ID.
2. What Doesn’t Always Transfer?
Although Apple’s transfer tools are highly reliable, a few items may require additional setup after the transfer is complete. These can include:
- Apple Pay cards (must be verified again)
- Some banking or authentication apps
- Downloaded music stored outside Apple Music
- Certain app-specific files
- Bluetooth pairings
- Saved login sessions for security-sensitive apps
- eSIM settings (depending on your carrier)
- Some downloaded offline content from streaming apps
This is completely normal and is designed to protect your personal information.
3. Do Apps Transfer Too?
Yes. If you’re transferring from another iPhone using Quick Start or restoring from an iCloud backup, your apps will automatically begin downloading from the App Store.
In most cases:
- Your apps appear on the Home Screen almost immediately.
- They continue downloading in the background.
- Supported apps restore your previous settings and data automatically.
Keep your new iPhone connected to Wi-Fi and power until all apps have finished downloading. If you’re upgrading to a refurbished device, you can find more at our refurbished iphones page.
4. Will My Photos and Videos Be Safe?
For most users, yes. Your photos and videos will transfer if you:
- Use Quick Start.
- Restore from an iCloud Backup.
- Restore from an encrypted computer backup.
- Use iCloud Photos.
If your photo library is very large, some images and videos may continue downloading after the initial setup. This is normal and simply requires a stable Wi-Fi connection.
5. What About Passwords and Saved Accounts?
Passwords can also transfer successfully, provided you’re using Apple’s secure backup methods. This includes:
- Saved website passwords
- Wi-Fi passwords
- Keychain passwords
- Most app logins
For security reasons, some banking apps, payment apps, and two-factor authentication services may ask you to sign in again after the transfer. This is a normal security feature rather than a problem with the transfer.
Expert Tip Before Erasing Your Old iPhone
Before erasing or trading in your old iPhone, take a few minutes to check that everything has transferred successfully. Open your Photos app, Messages, Contacts, Notes, and a few important apps to confirm your data is present.
Once you’re confident everything is working correctly, you can safely reset your old device and prepare it for sale, trade-in, or recycling.
How Long Does It Take to Transfer Data to a New iPhone?
One of the most common questions people ask before upgrading is “How long does it take to transfer data to a new iPhone?” The answer depends on several factors, including the amount of data you have, the transfer method you choose, and the speed of your Wi-Fi connection.
If you’re transferring only a few gigabytes of data, the process may be finished in less than 30 minutes. However, if your old iPhone contains thousands of photos, videos, apps, and documents, it could take an hour or more.
The good news is that Apple has made the process as seamless as possible, especially when using Quick Start or an iCloud backup.
1. Typical iPhone Data Transfer Times
Although every transfer is different, the table below gives a general idea of how long the process usually takes.
| Amount of Data | Estimated Transfer Time |
|---|---|
| Up to 10 GB | 10-20 minutes |
| 10-50 GB | 20-45 minutes |
| 50-128 GB | 45-90 minutes |
| 128-256 GB | 1-2 hours |
| 256 GB+ | 2 hours or more |
These are average estimates and may vary depending on your internet speed, the condition of your devices, and the transfer method you use.
What Affects iPhone Data Transfer Speed?
Several factors can make your transfer faster or slower.
1. Amount of Data
The more photos, videos, apps, and files stored on your old iPhone, the longer the transfer will take. A device with only a few apps will finish much sooner than one with hundreds of gigabytes of data.
2. Wi-Fi Connection
A strong and stable Wi-Fi network is essential, particularly when restoring from iCloud. Slow or unreliable internet can significantly increase transfer times.
3. Transfer Method
Quick Start usually offers the fastest experience because it transfers data directly between two iPhones. Restoring from an iCloud backup may take longer, especially if you have a large backup stored online.
4. Device Performance
Older iPhones may process data more slowly than newer models, which can slightly increase the overall transfer time.
5. Apple Servers
If you’re restoring from iCloud during periods of high demand, download speeds may occasionally be slower than usual.
How to Speed Up the Transfer Process?
While you can’t eliminate waiting altogether, you can reduce delays by following a few simple tips.
- Connect both iPhones to a reliable Wi-Fi network.
- Keep both devices plugged into power throughout the transfer.
- Update both iPhones to the latest version of iOS before starting.
- Close unnecessary apps on your old iPhone.
- Stay close to your Wi-Fi router if using Quick Start.
- Avoid using either device until the transfer is complete.
Taking these steps helps minimise interruptions and ensures your data is copied successfully.
Can You Use Your New iPhone While Data Is Still Downloading?
Yes. Once the initial setup is complete, you can usually start using your new iPhone straight away.
However, some content – such as photos, videos, apps, and documents – may continue downloading in the background. During this time, you might notice:
- Apps displaying a loading icon.
- Photos appearing gradually.
- Background downloads continuing over Wi-Fi.
- Slightly reduced performance until everything finishes syncing.
This is completely normal, and your iPhone will continue restoring your data automatically.
Expert Tip
If your transfer appears to pause for several minutes, don’t interrupt the process immediately. Large photo libraries and app downloads can take longer than expected, even when the progress bar seems unchanged. Keeping both devices connected to power and Wi-Fi is usually the best approach, as stopping the transfer early may require you to start the setup process again.
What to Do If Your iPhone Data Won’t Transfer?
Although Apple’s transfer tools are generally reliable, the process doesn’t always go as planned. Sometimes the transfer may freeze, fail to start, or stop halfway through. In other cases, your new iPhone might finish setting up, but some apps, photos, or messages don’t appear.
The good news is that most transfer issues can be fixed without losing your data. Before resetting your devices or booking a repair, it’s worth trying a few simple troubleshooting steps.
Why Is My iPhone Data Transfer Not Working?
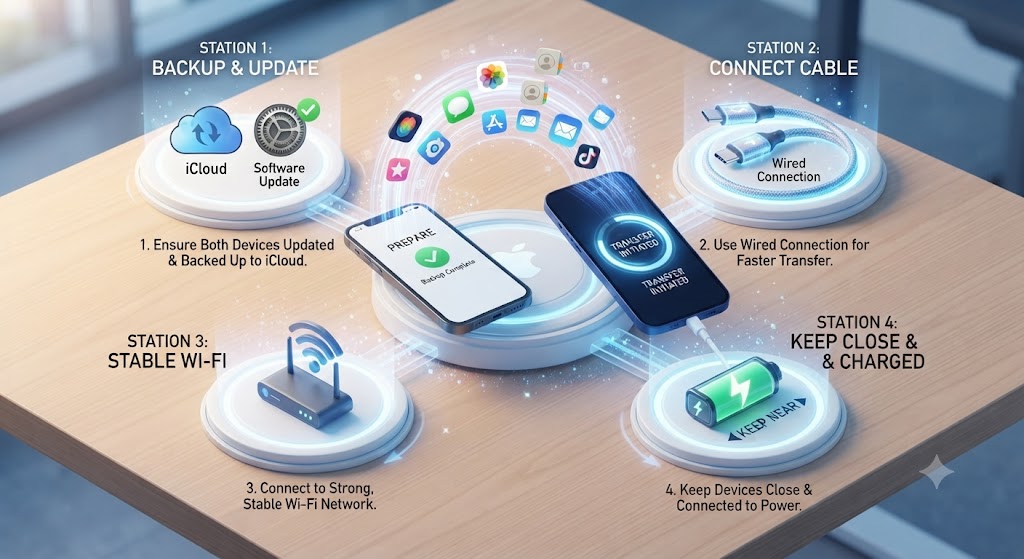
There are several reasons why your data may not transfer successfully.
Some of the most common causes include:
- Weak or unstable Wi-Fi
- Bluetooth is turned off
- An outdated version of iOS
- Insufficient iCloud storage
- Low battery on either device
- Interrupted setup process
- Temporary software glitches
- Apple server issues
Identifying the cause will help you choose the right solution.
1. Restart Both iPhones
A simple restart often fixes temporary software issues that may interrupt the transfer process.
If you’re unsure how to restart your device, follow our detailed guide How Do I Shut My Phone Off? Complete Guide for iPhone, Samsung & Android Devices before trying the transfer again.
To restart your devices:
- Turn off both iPhones.
- Wait around 30 seconds.
- Turn them back on.
- Start the transfer again.
Many users find that this resolves minor connection problems immediately.
2. Check Your Wi-Fi Connection
A stable Wi-Fi connection is essential for transferring data. If your connection keeps dropping:
- Move closer to your router.
- Restart your router if necessary.
- Avoid switching between Wi-Fi networks.
- Disconnect other devices using large amounts of bandwidth.
If you’re restoring from iCloud, internet speed has a major impact on how quickly your data downloads.
3. Make Sure Both iPhones Are Updated
Older versions of iOS can sometimes cause compatibility issues during setup.
Go to:
Settings > General > Software Update
Install any available updates on both devices before attempting another transfer. Keeping both iPhones on the latest version of iOS helps ensure the process runs smoothly.
4. Check Available iCloud Storage
If you’re restoring from an iCloud backup, make sure your backup completed successfully and that enough storage was available. You can check by going to:
Settings > Apple ID > iCloud > Manage Storage
If necessary, upgrade your iCloud storage plan or remove old backups before creating a new one.
5. Keep Both iPhones Connected to Power
Large transfers can take an hour or more. If either iPhone runs low on battery, the transfer may pause or fail completely. To avoid interruptions:
- Charge both devices above 50%.
- Keep both connected to their chargers until the transfer finishes.
6. Check That Bluetooth Is Enabled
Quick Start uses Bluetooth to establish the connection between your two iPhones. If Bluetooth is disabled, the transfer won’t begin.
Simply open Settings > Bluetooth and make sure it’s turned on before retrying.
7. Be Patient During Large Transfers
Many people think the transfer has frozen because the progress bar doesn’t move for several minutes. In reality, your iPhone may still be copying:
- Large photo libraries
- Videos
- Messages
- Apps
- Documents
Unless an error message appears, it’s usually best to leave both devices alone until the process completes.
8. Try Restoring from an iCloud Backup Instead
If Quick Start continues to fail, restoring from an iCloud backup is often the easiest alternative. During setup:
- Select Restore from iCloud Backup.
- Sign in with your Apple ID.
- Choose your latest backup.
This method may take longer, but it’s highly reliable for most users.
Expert Tip
If you’ve tried multiple transfer methods without success, avoid repeatedly resetting your new iPhone. Instead, verify that your latest backup is complete and then restore from that backup. Repeated interruptions can sometimes create duplicate downloads or incomplete app installations, making the setup process take even longer.
Is It Safe to Erase Your Old iPhone After Transferring Data?
Once your new iPhone is set up and working properly, many people wonder whether it’s safe to erase their old device. The short answer is yes – but only after you’ve confirmed that all your data has transferred successfully.
Before you reset your old iPhone, take a few minutes to make sure everything is exactly where it should be. Check your photos, contacts, messages, apps, notes, calendars, and important documents. Open a few frequently used apps to ensure your information has synced correctly.
If you’re using iCloud Photos, keep in mind that larger photo and video libraries may continue syncing in the background even after your new iPhone has finished setting up. It’s worth waiting until this process is complete before erasing your previous device.
1. What Should You Check Before Erasing Your Old iPhone?
Before resetting your old device, confirm that you’ve successfully transferred:
- Contacts
- Photos and videos
- Messages and iMessage conversations
- Apps and app data
- Notes and reminders
- Calendars
- Saved passwords
- Wi-Fi settings
- Health data (where applicable)
- Important documents and files
Taking a few extra minutes to verify everything can save you from accidentally losing valuable data.
2. How to Erase Your Old iPhone Safely?
After confirming that all your data is available on your new iPhone, you can safely erase the old one.
Go to:
Settings → General → Transfer or Reset iPhone → Erase All Content and Settings
Your iPhone will ask you to enter your passcode and Apple ID password before removing your personal information. Once the process is complete, the device returns to its factory settings and is ready for a new owner.
3. Selling or Trading In Your Old iPhone?
If you’re planning to sell, trade in, or recycle your old device, make sure you’ve completed these final steps:
- Sign out of your Apple ID.
- Disable Find My iPhone.
- Remove any eSIM (if required by your carrier).
- Erase all content and settings.
- Remove the SIM card if you’re keeping it.
- Clean the device and include any original accessories if available.
Completing these steps protects your personal information and makes the device ready for its next owner.
Thinking About Upgrading? A Refurbished iPhone Could Save You Money
If your old iPhone is becoming slow, has poor battery life, or no longer supports the latest iOS features, upgrading may be a better long-term option than paying for multiple repairs.
Professionally refurbished iPhones offer many of the same features as brand-new models at a significantly lower price. They’re carefully tested, cleaned, and quality checked, making them an excellent choice for students, professionals, families, and anyone looking to save money without compromising on performance.
If you’re unsure which model is right for you, you can also learn more about the benefits of refurbished devices in Are Refurbished Phones Good?, understand the refurbishment process in What Does Refurbished Mean?, or browse Where to Buy Cheap iPhones? for affordable upgrade options from trusted UK sellers.
Expert Tip
Don’t rush to erase your old iPhone immediately after the transfer finishes. Use your new device for a few hours – or even a day if possible – to make sure everything is working as expected. Once you’ve confirmed that all your important files, apps, and settings are present, you can confidently reset your old iPhone for resale, trade-in, or recycling. This simple check helps avoid unnecessary stress and ensures nothing important is left behind.
FAQs About Transferring Data to a New iPhone
1. What is the easiest way to transfer data to a new iPhone?
The easiest method is Apple’s Quick Start feature. Simply place your new iPhone next to your old one, connect both devices to Wi-Fi, and follow the on-screen instructions. Quick Start transfers your apps, photos, contacts, messages, settings, and more without needing a computer.
2. Can I transfer everything from my old iPhone to my new iPhone?
Yes. In most cases, you can transfer almost all your personal data, including photos, videos, contacts, messages, apps, notes, calendars, Safari bookmarks, Wi-Fi passwords, and device settings. Some security features, such as Apple Pay cards and Face ID, must be set up again after the transfer.
3. How long does it take to transfer data to a new iPhone?
The transfer time depends on the amount of data you’re moving and the speed of your Wi-Fi connection. Small transfers may take 15–30 minutes, while larger backups with thousands of photos and videos can take several hours.
4. Do I need iCloud to transfer data to a new iPhone?
No. You can transfer your data using Quick Start, restore from an iCloud backup, or use a backup stored on a Mac or Windows PC. Quick Start is often the fastest option for users who have both devices available.
5. Will my photos and videos transfer automatically?
Yes. If you use Quick Start, iCloud Backup, or an encrypted computer backup, your photos and videos will transfer automatically. If you use iCloud Photos, your media library will continue syncing after setup until all content has downloaded.
6. Can I transfer data from an Android phone to an iPhone?
Yes. Apple offers the Move to iOS app, which helps Android users transfer contacts, messages, photos, videos, calendars, and other supported data to a new iPhone during the setup process.
7. Why is my iPhone data transfer stuck?
A transfer may stop because of a weak Wi-Fi connection, low battery, outdated iOS software, insufficient iCloud storage, or temporary software issues. Restarting both devices and ensuring they are updated often resolves the problem.
8. Can I use my old iPhone while the transfer is in progress?
It’s best not to. Using either device during the transfer may interrupt the process and cause delays or incomplete data transfers. Leave both iPhones connected until the setup finishes.
9. What should I do if my new iPhone isn’t transferring my apps?
Ensure both iPhones are connected to Wi-Fi and signed in with the same Apple ID. Some apps may continue downloading in the background after setup, so keep your new iPhone connected to the internet and power until all downloads are complete.
10. Will my WhatsApp chats transfer to my new iPhone?
Yes, if you’ve backed up WhatsApp to iCloud or use WhatsApp’s built-in chat transfer feature. Make sure you’re using the same phone number and Apple ID to restore your chat history successfully.
11. Do text messages and iMessages transfer to a new iPhone?
Yes. Your SMS messages, MMS messages, and iMessages are included when using Quick Start, iCloud Backup, or an encrypted computer backup.
12. Can I transfer my data without Wi-Fi?
Quick Start requires Bluetooth to establish the connection and usually uses a direct wireless connection between the devices. However, restoring from iCloud requires a stable internet connection, while a computer backup can be restored without Wi-Fi.
13. Will my passwords transfer to my new iPhone?
Yes. If you use iCloud Keychain or restore from an encrypted backup, your saved Wi-Fi passwords, website passwords, and many app passwords will transfer automatically. Some banking and security apps may require you to log in again.
14. Why won’t my new iPhone detect my old iPhone?
This can happen if Bluetooth is disabled, one device is running an outdated version of iOS, or the devices are too far apart. Restarting both iPhones and enabling Bluetooth usually fixes the issue.
15. Is it safe to erase my old iPhone after transferring my data?
Yes, but only after you’ve confirmed that all your photos, contacts, messages, apps, and other important files are available on your new iPhone. Once everything has been verified, you can safely erase your old device.
16. Do I need to back up my iPhone before transferring data?
Although Quick Start transfers data directly between devices, creating a recent backup is always recommended. A backup protects your information if something unexpected happens during the transfer process.
17. Can I transfer data after I’ve already set up my new iPhone?
Yes, but you may need to erase your new iPhone and start the setup process again if you want to restore from Quick Start or an iCloud backup. Alternatively, you can manually sync certain data using iCloud.
18. Does transferring data also transfer my Apple ID?
No. Your Apple ID itself isn’t transferred. You’ll need to sign in with your Apple ID on your new iPhone during setup to access iCloud, the App Store, Apple Music, and other Apple services.
19. Should I repair my old iPhone or buy a refurbished one?
If your current iPhone only has a minor issue, such as a battery replacement or screen repair, repairing it may be the most cost-effective option. However, if it has multiple hardware problems or no longer supports the latest iOS updates, upgrading to a professionally refurbished iPhone can provide better long-term value.
20. Where can I buy a reliable refurbished iPhone in the UK?
Choose a trusted retailer that professionally tests, cleans, and quality-checks every device before sale. A reputable refurbished iPhone should also include a warranty, transparent grading, and reliable customer support, giving you confidence when upgrading while saving money compared to buying new.
Conclusion
Transferring data to a new iPhone doesn’t have to be complicated. Whether you choose Quick Start, iCloud Backup, or a Mac or Windows backup, Apple provides several secure and reliable methods to move your photos, videos, contacts, messages, apps, and settings without losing your important data.
Before starting the transfer, make sure both iPhones are updated to the latest version of iOS, connected to a stable Wi-Fi network, and have sufficient battery life. Creating a recent backup is also a smart precaution, giving you an extra layer of protection if anything unexpected happens during the process.
If you experience issues such as a frozen transfer, missing apps, or incomplete backups, don’t panic. Most problems can be resolved with simple troubleshooting steps, and in many cases, restoring from an iCloud or computer backup is all that’s needed to complete the setup successfully.
Finally, before erasing or selling your old iPhone, take a few minutes to confirm that all your important data has transferred correctly. Once you’ve verified that everything is working as expected, you can confidently reset your old device for resale, trade-in, or recycling.
Upgrade to a Refurbished iPhone with iExpert Market
If you’re moving to a newer iPhone, there’s no need to pay full retail price. At iExpert Market, you’ll find a wide range of professionally refurbished iPhones that have been thoroughly tested, professionally cleaned, and quality checked to ensure reliable performance. Every device is backed by a warranty, making refurbished iPhones a smart and affordable choice for anyone looking to upgrade while saving money.
Whether you’re looking for the latest iPhone or a budget-friendly older model, iExpert Market offers trusted refurbished devices that combine excellent value with dependable quality.
Back to posts